
(Note: Here's my second Lulu Blog Book!)
My Lulu blog book arrived this last weekend, and I love it. I seriously do. I totally want to do my future blog books like this. Here's what it came wrapped like:

Here's the cover (I got the hardcover "Casewrap") and what some of the posts look like in the book:


Here's a shot of the binding (which seems sturdy):

The only construction fault I can find is that in the between the cover and the first end page, a thin line of orange glue is visible:


It's not too noticeable; I didn't see it until I was taking pictures.
The picture quality is good (not amazing); it's what I was expecting for black and white on this type of paper. (The paper is what you'd find in a good quality hardback. It's not shiny paper, like Shutterfly; it's matte. But still good quality.)
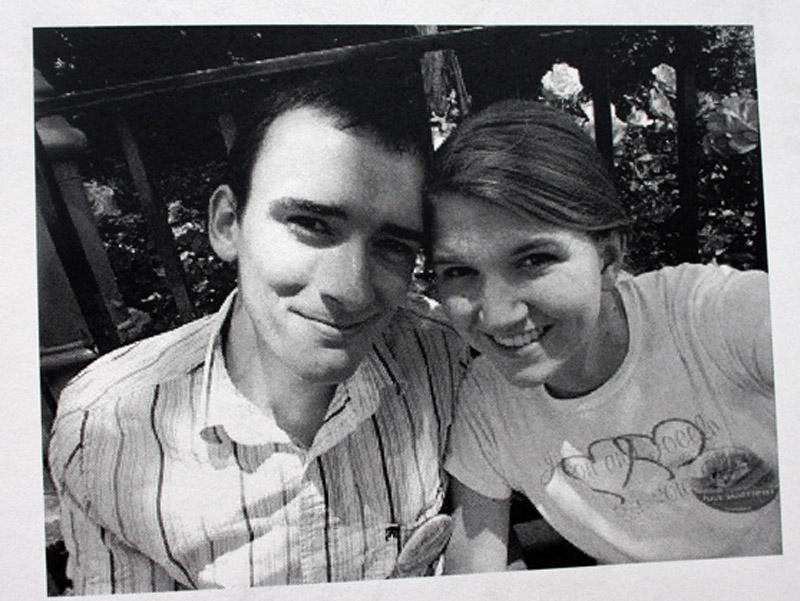
The photos have a bit of graininess to them; again, it's not Shutterfly. But, it's what I was expecting and they do their job of preserving memories just fine.
Here's the back:

And that's the book! I'm a fan.
Okay, since it does take some work to put it together (it's not just a one-click process), I'm going to go through the step-by-step process you would need to do to make a blog book with Lulu. To make a book with Lulu, you need to make a pdf file of your blog and upload it to their site.
Here's how you can make a Lulu blog book (faster and better than I did):
Before you start: Start with a computer that has both internet and Microsoft Word. This will make everything so much easier.
Step 1: Get Lulu's template.
Go to Lulu's website (www.lulu.com), click on "publish" at the top, click "start publishing your book," sign up for a free membership, and then choose the size book you want. I did a a hardcover "Casewrap" 8.25x10.75, as it was closest to what Blog2Print and Blurb both offer and seemed to be the best format for a blog. Once you've chosen the size, download the template they have for that size. Open the doc file on your computer. (For example, the file I opened was "8.25_template.doc")
Step 2: Get your posts.
From your live blog, copy and paste each post (including date, title, and comments) to that Word document. Do this chronologically (start with the oldest post first), so that when you read the book you're reading from oldest to newest.
Step 3: Make your pictures smaller.
If you want smaller pictures (for easier formatting and to save pages), you have two options:
- You can select the picture and shrink it right in Word, or
- Go to the Post Editor in Blogger. Click on each post, resize the pictures, and copy and past the post body into your document.

Step 4: Change your fonts.
The easiest way to do this would probably be with Word's "Styles" feature. Word probably has an explanation of how to use it in its "help section," or you could just follow these directions:
Find where it says "Styles"on the right side of the "Home Bar." It has a few default styles, but you can create your own custom style by changing a section of text to the font, size, and color that you want it (for example, I changed the first title to the font Georgia, size 24), highlighting that section, clicking on the bottom of the three arrows on the left of "Change Styles," and clicking on "Save selection as a new quick style." You give it a name, such as "Titles." Then just go to each blog post, highlight the title, click on the style "Titles," and voila! It will change it to your custom font, size, and color.
For my titles, I used Georgia size 12. For the date stamp I changed it to MS Reference Sans Serif size 12, white, and highlighted the background gray. (I had to do the highlighting manually. You can't do it in "Styles.") I also did the same thing with the "Comments" title at the bottom of the post, except I changed it to Georgia size 16. My basic font was Trebuchet size 12. (Note: the Trebuchet size 12 looks a little big in the printed book, so for my second book I changed it to Trebuchet size 11. Now it looks great!)

So, first highlight ALL your text and change it to your basic font. Then, make a "style" for your date stamp, title, and comments title. Go through each post and change what you want using your "style."
If that didn't make sense, search Word's help section for "styles." It really will save you time. :)
Step 5: Format your comments.
Copying and pasting may have messed their format up a bit. What I did was remove all the hyperlinks (you can do this by right clicking on a blue underlined word and selecting "Remove Hyperlink"), changed the font color back to black, removed the underlining, removed the pictures, bolded the names of the commenters, and spaced and dashed their name apart from the date/time they posted the comment.


(Note: If you're somewhat tech savy, you can run a macro in Word and remove all hyperlinks at once. Just google how to do it. I did this for my second Lulu blog book, and it saved me a lot of time!)
Step 6: Format your posts.
Space and format your posts how you want them; this is where you can space them so each new post starts on its own page. In my own book I spaced the posts so that most of them started on their own page. Some fit together well, so I left them on the same page. I also paid attention to the page numbers at the bottom of each page, and tried to keep two-page posts facing each other on a left and right page spread.
 |
| Most posts started on their own page, but these two fit well together so I left the second one underneath the first one's comments. |
Step 7: See if you have extra space.
Go through and see if you have any extra space on any pages you'd like to take advantage of by making some pictures bigger. After changing all the fonts and spacing all the posts, I went through and wrote down if I had extra space on any page. On several posts I went back to blogger and got a "medium" or "large" sized picture to replace a "small" one.
 |
| This post was going to take up two pages no matter what, but I had lots of extra room on the second page. So, I went back and made two of the pictures large because I could. |
Step 8: Create your title page.
Create your title page on the very first page of the book. Leave page #2 empty if you'd like your table of contents to start on the right side.
Step 9: Create a table of contents.
Time to create a table of contents! I put my table of contents on page #3, after the title page and a blank page. "Contents" was the title at the top in Georgia size 24, and below that I created a two-column table with as many rows as I had posts. I used Trebuchet size 12 for the post titles in the table of contents. My table of contents was three pages long, so I left the page after it (#6, a left page) blank so that my first post would start on a right page.
Step 10: Do a final check.
Do you have all your posts? Does each one have a date, title, and any comments that were written? Do you have all your pictures and are they the size you want them? If you want them to, does each post start on its own page? Is everything spaced how you want it? Do you have a title page? Do you have a table of contents? Are the page numbers in the table of contents accurate? Go through and make sure everything is the way you want it. (And make sure you're using the template from Lulu!)
Step 11: Save your Word document as a PDF file.
It's very important to save your file correctly, since doing so will "embed" your fonts and pictures in the PDF and make sure they print correctly. Lulu has instructions here on how to save your file as the right kind of PDF, found here.
Step 12: Upload your PDF file to Lulu.
Go back to your account on Lulu and go through the publishing steps again, which will lead you to upload your PDF file. Go through the steps to create the interior. It will give you a preview PDF; look through the whole thing and make sure everything's good.
Step 13: Use Lulu's Cover Wizard to create your cover.
You can either use the templates they supply you, or you can create and upload your own jpg to use for the cover. Since I wanted a bit more customization, I created a jpg for the front and one for the back, uploaded them, and stuck them on. I then customized the spine. I made it white, with the title of my blog, "Volume 1," and the dates it covers.
Step 14: Preview and order! You're done!
If I've missed anything or you have any questions, feel free to ask.
I want to remind you what I said at the beginning of this post: Creating a Lulu book is easier than it looks. Don't get intimidated by this process because the instructions look long. It's actually really easy. Just try it.
Like I said, I'm very pleased with the quality and the price. I'm pretty darn sure I'll be using Lulu to make my future blog books, which I plan on doing annually.
Woot!
Be sure to check out these posts, too!
Love your tutorial. I'm wanting to print up my old blog and was exploring some options. Perfect timing! :)
ReplyDeleteGreat Great Great!!
ReplyDeleteQuestion: How did you get the cute little picture photostrip on the top of your blog??
ReplyDeleteWell, I did it in Photoshop. It was a multi-step process, and it was a while ago, but here's what I remember doing: I first needed to know how wide my blog was. So, I went to Blogger. On the left where it has the options for your blog, I clicked on "Template," then "Customize" (under "Live on Blog"), then "Adjust Widths," and that's where I found out exactly how wide my blog was.
DeleteNext, I went to photoshop. I chose the pictures I wanted to go in the header, and lined them up next to each other (on one screen, using layers, I think. Do you know how to use layers?). I got the yellow frame from some free digital scrapbook stuff I downloaded from online, and I put it around the pictures. Then I used text on top of the pictures to write the name of my blog. Now that it was all put together, I checked the size of the image, and made sure it was the right number of pixels wide (from what I found in the first step). I saved it as a jpg.
Going back to blogger, I clicked on "Layout" (on the left side of the page" and clicked "edit" on the title. I chose the option to use an image instead of a title and description, and uploaded the jpg file.
So yeah, it's kind of complicated, but that's how I did it. Do you have photoshop? If you don't, or if you need help, or if you have any more questions, I can help.
Thank you soo much!! Drew's really good at photoshop so I'll show him your directions! Super helpful! Thanks!!
DeleteHi, I stumbled across your posts when I googled other options for Blog2Print. I am going to try to print my blog via Lulu after reading your posts. Thank you! (I printed one book using blog2print but can't stand how it breaks up my posts)
ReplyDeleteHi, could you explain how you made such a cute cover? There is nothing cute on Lulu, and I don't even know what websites to go to in order to create my own jpg. Where can I find a nice background like your polka dots and what do I need to know to make sure it will be compatible with the sizing of my book on Lulu (I used the same book size you did). I would so appreciate any advice you can give me! I've spent a week creating my book, and now I am so disappointed with Lulu's cover options!
ReplyDeleteHi Natalie! I'm sorry you're having problems with the cover; that's frustrating! I created my cover with Photoshop. The polka dot background was a jpeg that I used as the background, which I then put a picmonkey collage and the blog title on top of. I then saved that whole thing as a jpeg and uploaded it to their cover creator. If you want some cute backgrounds you can check out digital scrapbooking sites like this one: http://www.shabbyprincess.com/index.php/category/downloads/.
DeleteIn regards to sizing, I attached the cover templates from Lulu that came in the file with the book template for the size we used. They're kind of confusing, as they've got a couple different lines going on. But basically, everything in the gray area will be on your cover, and the orange part will be wrapped around the cover/cut off.
I didn't use the cover templates with my first books, as I found them confusing. I just made a jpeg cover a couple different sizes and uploaded it to the site, and kept changing the size until it looked right. I used the template with the last book I made and it was less trial-and-error, but it took me a while to figure out how to use them.
Does that all make sense? Sorry, I feel like it's confusing. In a nutshell: I used a jpeg that I made in photoshop, and uploaded it in different sizes (about 9"x12") until it looked right.
Thank you so much for this post and all your help. With all the problems I had creating my cover, I decided to make a post detailing how to do that. I hope you don't mind I linked your blog in my post as well. If you want to check out the post, it is http://schoolofnatalie.blogspot.com/2013/01/how-i-printed-my-blog-book-with-lulu.html
ReplyDeleteThanks again!
That's a great tutorial on the cover! Thank you. I'll add my reply to your comment here, too, in case that helps people.
DeleteThis is a neat idea. Can you tell me how much more it would have cost if you would have gone with color pictures?
ReplyDeleteIf I had done it in color, the price (without shipping and without any discounts) would have been $45.50. :)
DeleteI cannot tell you how helpful this has been to me. I've researched printing my blog dozens of times and thought my only options were blurb or blog2print, and I couldn't use either of them for all the reasons you noted in your comparison post. I don't mind a little extra work if my book turns out exactly like my blog. Thank you SO much for taking the time to share your experience and how you did it!
ReplyDeleteYou're welcome! I'm glad I could help.
DeleteI have one more question: Were you able to just copy and paste your entire post, including pictures, into the Word doc? I'm only getting text. If I go back through and copy and paste each individual photo it will let me do that, but I was wondering if there was a trick to make this easier that I'm missing. I'm working on a Mac, but I don't know if that makes a difference.
ReplyDeleteWhen I did it, I started out using a Mac and TextEdit, and it wouldn't copy my pictures into TextEdit. So, I switched over to a PC with Windows and Microsoft Word and copied and pasted with that, and it worked fine (and included the pictures). I don't have Microsoft Word on my Mac, just TextEdit and Open Office (and it didn't work well in either of those), so I've never tried Microsoft Word with a Mac and don't know if that combination will work. It might just be that this doesn't work with Macs. I'm sorry! Maybe there's a way to get it to work that I don't know.
DeleteYeah, that's the conclusion I'm coming to (that it doesn't work with Macs) I have Word on my Mac but it's not letting me copy my images. I've tried saving the post via Evernote and then copying that into Pages, and I was able to get the images that way, but I don't know how to format the Pages document to match the Word document for printing on Lulu. Guess I will try to find someone with a PC who will let me tinker with it on their computer. Thanks for the reply :)
DeleteStumbled upon your post when I too was trying to find a simpler and nicer looking way of getting my blog to a printed book. I however, am also using a mac. I am using the pages program. Surely wish there was an easy way to get those pictures using the mac...that's frustrating. I love how your book turned out.
DeleteI have tried this in the past with a Mac and like those have said, the pictures did not copy over....I have recently tried it again and now the pictures do copy over!!! Yea!!
DeleteThanks for your post! I have had my blog since 2006 and every time I thought about printing it out, I got so frustrated with blurb and with blog2print and so I just kept putting it off. So nice to see there is another option. I started working on my document last night -- getting everything all nice and organized. I'm using Open Office and so far I haven't had any issues. Yay! I'm so excited!
ReplyDeleteHi, thank you for posting this! It has been very helpful and I'm excited to finally be able to print my blog with the formatting I choose! Two quick questions: I am copying and pasting the blog into Word as you described and having a little difficulty with the pictures. They all have hyperlinks attached and every time I click on the picture it tries to open it up in a web browser. I have to go through each one and remove the hyperlink -- do you know any way to do this for the whole document? Also, any of the picture with captions (and the caption box around the pic) is very tricky to move where I want it, and the formatting with these gets messed up. Any suggestions? Thank again :)
ReplyDeleteThanks a lot for your tutorial, great job
ReplyDeleteI was in the middle of my blog2print book and decided just to google to see if anyone had reviews on it when I stumbled upon your blog. Like you, I also gave up one using Blurb, because I thought I was going to DIE at how tedious it was! I felt like so much of my life was wasted trying to reconfigure EVERY blog post and picture. UGH!
ReplyDeleteSo grateful I stumbled onto your blog to find your review and this tutorial! I am also LDS! Nice to see someone else using her blog as a way of journaling family adventures like me! :)
First of all, thank you - thank you - thank you! I have struggled for years to get my blog books done because I didn't like either of the other options - exactly the same frustrations you had! So glad I stumbled upon your blog! It looks like Lulu is a great option! I have copied and pasted one year of my blog into Word, but I'm struggling with the photos. When they are copied and pasted they are a tiny resolution (like 30kb) but they were taken and uploaded to Blogger at like 3MB+ resolution. Anytime I try to enlarge them at all in Word, they get pixelated (is that a word?) and grainy. Is there another easier option to get them copied or pasted easily so they will enlarge well, or will I have to go back and find and upload all the original photos straight into Word? Seems like that will be a HUGE Word doc (it will be 200+ pages). Thanks for any help you can offer!
ReplyDeleteSooo happy you posted this! I've been wanting to publish my family blog since I started it in 2011 and have been so unhappy that I couldn't seem to get the formatting right on blog2print. Your tutorial is awesome. Lulu should give you a free book. :)
ReplyDeleteI just uploaded all my blog pics for this school year to print at Costco, total... $40. I may as well print the whole darned blog and get the sequential order, in colour and within context! Thanks for posting :)
ReplyDeleteHi there--I'm finding this post about 3 years after you originally posted it. Do you still like using Lulu? I only blog for my missionary kids' blogs, and now that one is home I want to make a book for their 2 year journey. Do you think that's possible in one book, with 1 post & pictures a week plus extra posts before they left and returned? Would I need to do 2 books? Any advice would be awesome!
ReplyDeleteThank you - very helpful. Did you reformat your blog template to allow easier copying and pasting?
ReplyDeleteIt is crazy that this post is from five years ago and Blurb and Blog2Print are both still so terrible and impossible to format. My sister used to use Blurb and had lots of complaints and a friend uses Blog2Print and just had to deal with however it came out. When you pay almost $100 for a book you want it to be pretty good! I keep thinking if I wait long enough eventually one of these companies will figure out a better way to do this. Most technology advances right? I like you option, but even that does take a decent amount of work on my part. For the price I am willing to try! I was also just wondering if you still use Lulu and if they have made any changes or improvements. I am currently working from a Mac so it sounds like I might have to move to a PC to really get it to work. You really should get some kind of compensation from Lulu because I bet you have sent tons of traffic their way. Even though it has been five years you seem to be the only expert on the subject. You were the third thing to come up in a Google search for blog books. You should really ad a pin of this on Pinterest because a search on there offered nothing helpful.
ReplyDeleteI am looking for either an easy way to create a book from my weekly blog that includes images and text, or to pay someone to do it for me. Can you help?
ReplyDelete